Node.js Application with a DevOps Workflow using Github, Jenkins, SonarQube and Azure Kubernetes

Setting up a DevOps Environment using Node.js, Github, Jenkins, SonarQube, and Azure Kubernetes

Developing a Node.js application is a common use case in the software development industry. In this article, we will show you how to set up a DevOps environment for a Node.js application using Github, Jenkins, SonarQube, and Azure Kubernetes.

Github is a version control system that allows you to store and manage your code in a centralized repository. To start, you need to create a Github repository for your Node.js application.

Next, we will set up Jenkins for continuous integration. Jenkins is a tool that automates the process of building, testing, and deploying code. To configure Jenkins, you will need to install the Jenkins plugin for Github. This plugin allows Jenkins to automatically build and test your code when changes are pushed to the Github repository.

After that, we will set up SonarQube, which is a code quality tool. It analyzes the source code of your application and identifies potential issues such as bugs, security vulnerabilities, and code smells. To set up SonarQube, you need to install the SonarQube Jenkins plugin. This plugin integrates SonarQube with Jenkins and allows you to run code analysis before deploying the code.

Finally, we will deploy the application to Azure Kubernetes, which is a managed Kubernetes service provided by Microsoft. To deploy the application, you will need to create a Kubernetes cluster in Azure and configure it to run your application.

In summary, by setting up a DevOps environment using Node.js, Github, Jenkins, SonarQube, and Azure Kubernetes, you can automate the process of building, testing, and deploying code, ensuring that your application is of high quality and is deployed to production in a timely manner.

How to set up a Kubernetes infrastructure on Azure and install applications using Helm in less than 20 minutes

Setting up a Kubernetes Infrastructure on Azure

Kubernetes is a powerful open-source platform that helps to manage and automate the deployment, scaling, and operation of containerized applications. In this article, we will show you how to set up a Kubernetes infrastructure on Azure and install applications using Helm in less than 20 minutes.

Prerequisites:

  • Azure account: To set up a Kubernetes infrastructure on Azure, you need to have an Azure account.
  • Azure CLI: You also need to have Azure CLI installed on your local machine.

Step 1: Create a Kubernetes Cluster on Azure

The first step is to create a Kubernetes cluster on Azure. You can do this by running the following command in the Azure CLI:

az aks create --name <cluster-name> --resource-group <resource-group-name> --node-count <node-count> --generate-ssh-keys

Replace <cluster-name> with the name of your Kubernetes cluster, <resource-group-name> with the name of the resource group in which you want to create the cluster, and <node-count> with the number of nodes you want in the cluster.

Step 2: Install Helm

Helm is a package manager for Kubernetes that helps to manage the installation, upgrade, and deletion of applications in a Kubernetes cluster. To install Helm, you need to run the following command:

curl https://raw.githubusercontent.com/helm/helm/master/scripts/get-helm-3 | bash

Step 3: Deploy an Application using Helm

Now that you have Helm installed, you can deploy an application in your Kubernetes cluster using Helm. To deploy an application, you need to find a Helm chart for the application that you want to deploy. You can find Helm charts for different applications on the Helm Hub.

Once you have found the Helm chart for the application you want to deploy, you can install it in your Kubernetes cluster by running the following command:

helm install <release-name> <chart-name>

Replace <release-name> with the name you want to give to the release and <chart-name> with the name of the Helm chart for the application you want to deploy.

Conclusion

In this article, we have shown you how to set up a Kubernetes infrastructure on Azure and install applications using Helm in less than 20 minutes. By using Helm, you can simplify the process of deploying and managing applications in a Kubernetes cluster, making it easier to manage your infrastructure.

Node.Js to Kubernetes journy

Node.Js to Kubernetes journy

Hello all,

Yea yea long time no see 🙂 I know, I haven’t share a new improvement story for long time . Improvement is a kind of life style for me but I couldn’t have time share all of it.

In the mean time I had a lots of changes in my life but the most important is , I have owned my own company , Bigs Bilisim Ltd.Sti. “https://www.bigsbilisim.com”

This days , I have some spare time to write a blog , here is the my latest post

Node.Js Application on Docker.

I am managing a multinational companies infrastructure as a Linux / Windows admin and Devops Engineer . My customers ERP systems has no access to internet in any way. ERP systems internet access is not allowing even by a proxy because of the company policy.

Every morning one of trainee updating the all exchange rates in the ERP system manually. Time to time wrong entries or similar mistakes can cause couple of problems.

One day one IT Application teams member called me and can we write a small app for this manual operation. Because ERP system has got the ability of import xml files to ERP system . T.C. Mekez Bankası also publishing the rates as xml format. My answer was challenge accepted 🙂

Well I am not a programmer but I though, I can handle it some how.

I have googled couple of similar solutions and scenarios about the requested solution. I have found the node.js world.

I have wrote the code in one day , If you consider , I don’t have programmer background , it is good timing , I guess.

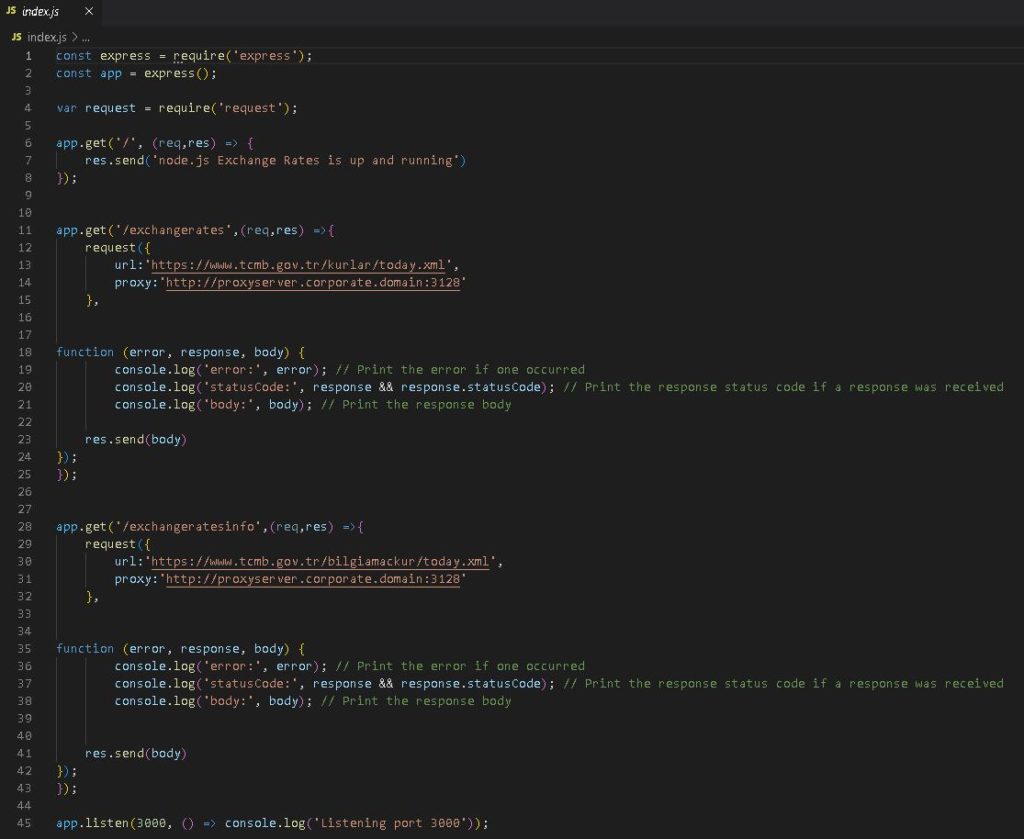
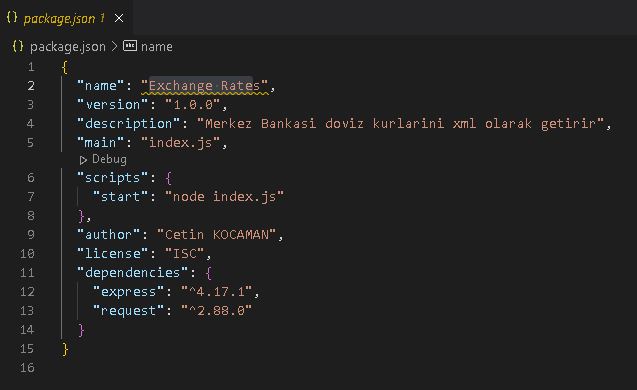
Here is the code of

index.js and package.json

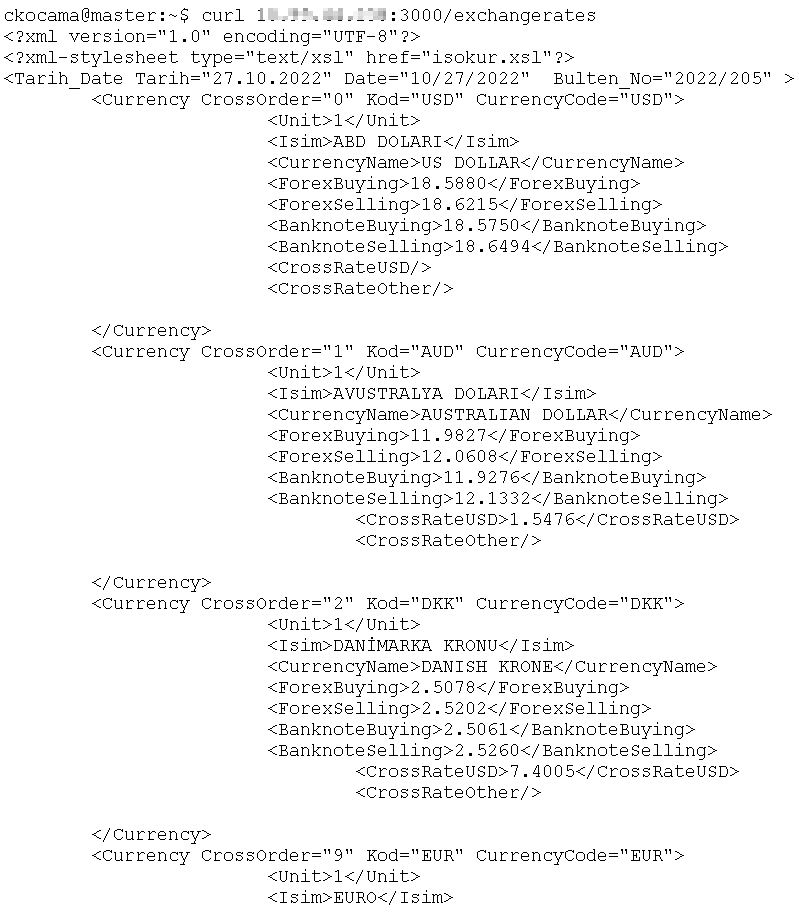
Now when I have run the program in node js it is getting the exchange rates as in xml format by calling url;

Like ;

curl xxx.xxx.xxx.xxx:3000/exchangerates

When they have try to call this url via ERP systems it was successfully entering the Exhange Ratest in it.

Now the challenge is how this small program run in smooth environment without any effects.

This wasn’t a hard task to do it but this time I would like to made a fantasy;

Lets dockerize it.

I have share this program and my dockerize fantasy with the customer, They love it and they were really looking forward the taste it of container technology .

First I have install docker desktop to my machine ,

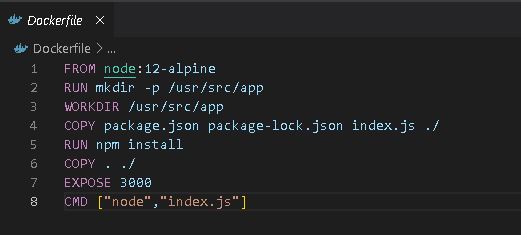
It was another challenge for me , but after watching couple of video , I have prepared the Docker file for this program.

Now I need to create the docker container on my desktop.

I have used this command:

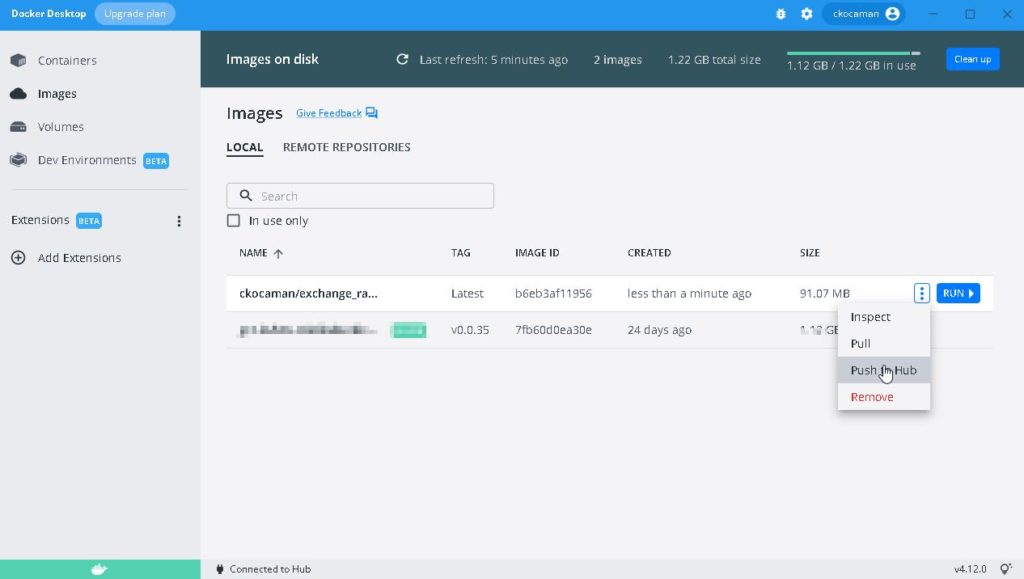
docker build . -t ckocaman/exchange_rates:”Latest”

After creating the container I have push it to my docker hub account.

After pushed to hub , I can install on any containerized technology system.

At the beginning it was working on a single docker server , in these days it is a part of a kubernetes cluster as a pod and service.

This small application development story has been opened the application virtualization technology window to me. Well I am still learning it ( I hope every IT Guys keep learning every day !) , but I assume I can do better things with that .